Modify a Vesting Schedule
If you have created a vesting schedule on Eqvista and made a mistake or changed your mind about some details, you can modify the vesting schedule on the app.
Here is the step-by-step guide on how to modify a vesting schedule.
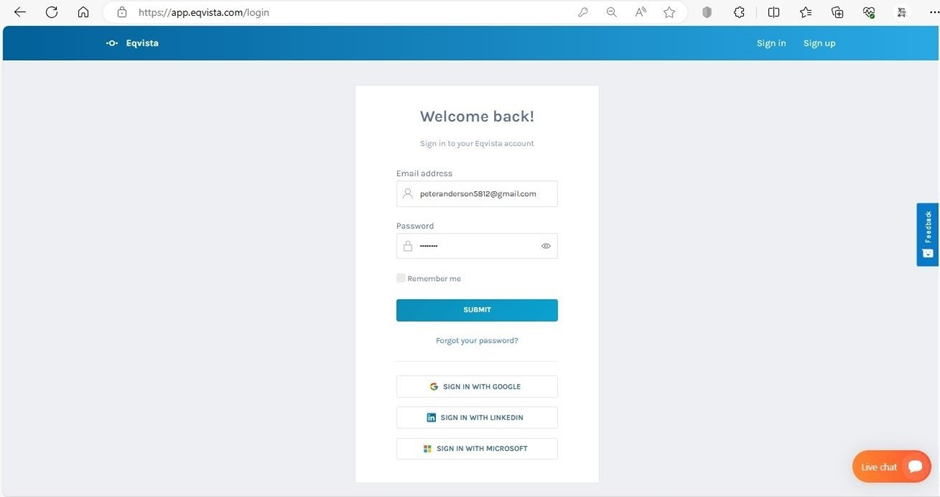
Step 1: Login into your account on Eqvista and select the company account that you want to modify the vesting schedule.
From the company’s main dashboard, select the option “Cap Table” and a drop-down menu will appear. Then, select the option “Vesting and plans”.

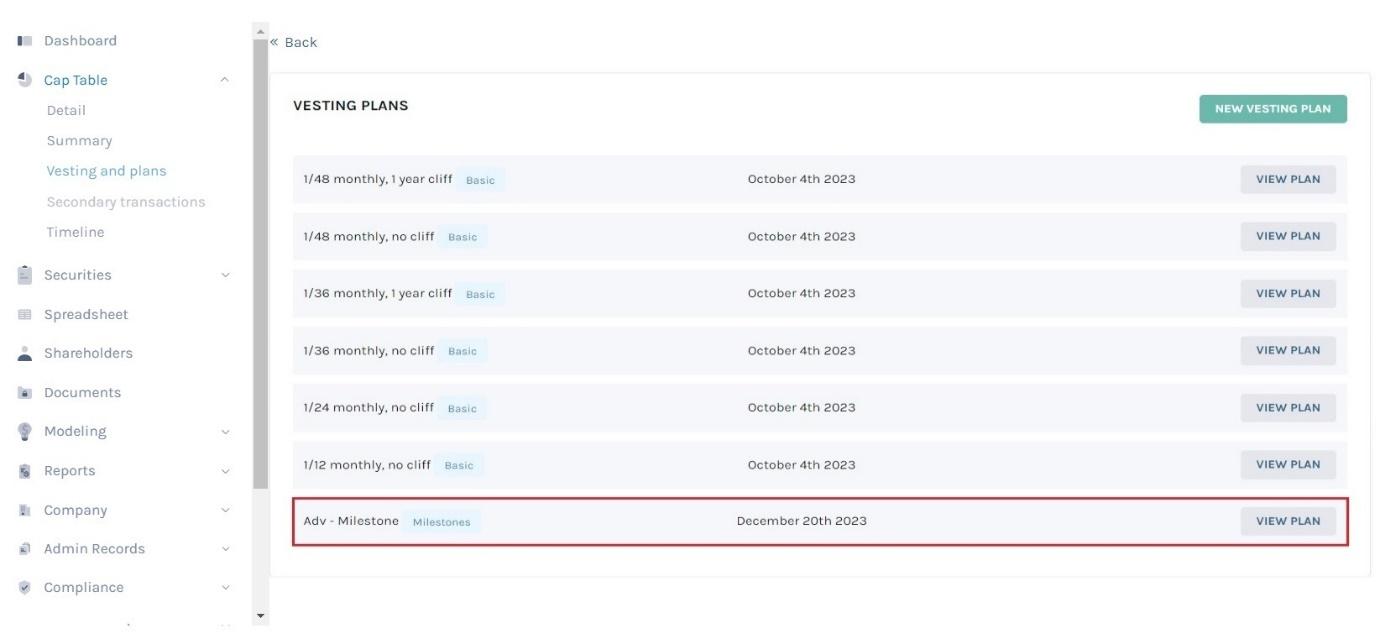
Step 2: With this, you will be directed to a page where you can see all the vesting plans that have been created. In case your company doesn’t have any vesting plan, you will see the message saying “There are no vesting plans created” and an option “Create Vesting Plan” below it.
Note: You can create your vesting plan or choose from six default plans. To know more about vesting plans, check out the support article here!
To modify a vesting schedule, you need to have a vesting plan already created or choose from the default vesting plans. You can modify the plan by clicking on the “View Plan” option beside the plan name. In this case, we selected the plan “Adv – Milestone”.
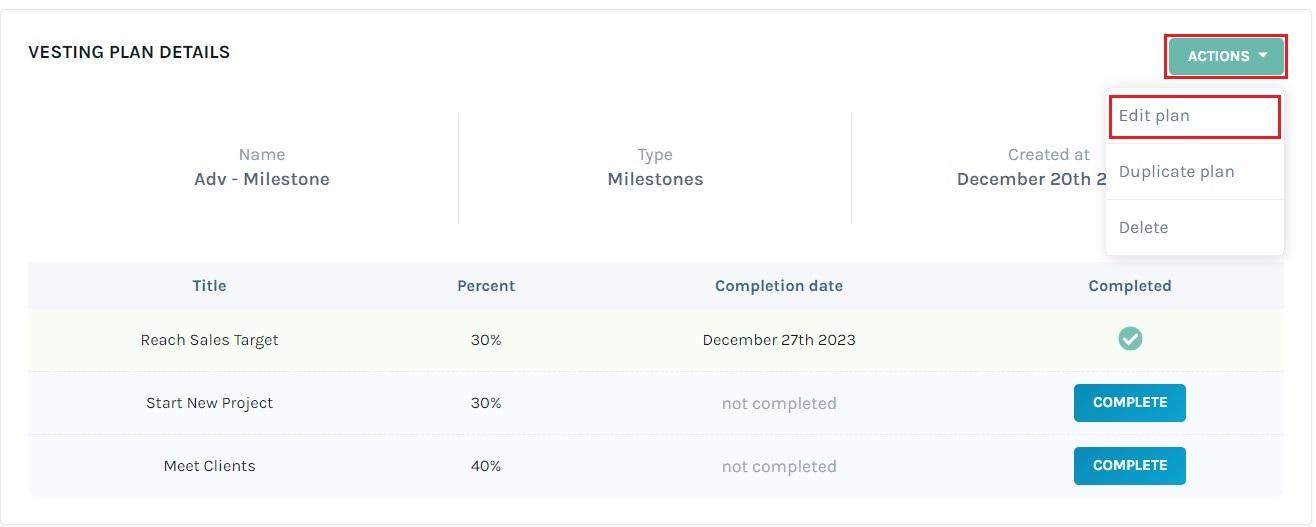
Step 3: Once you do this, you will reach the next page as below. Here, you will see all the details of the vesting plan and a button on the top right side stating “Actions”. Click here and then on the option “Edit plan” from the drop-down menu that appears.
Note: If the vesting plan has been applied for any share grant, then the plan cannot be edited.
Step 4: Once you click on this, the page will refresh and some options will appear allowing you to edit the plan.
You can edit the vesting plan name and type. As this is a milestone plan, you can change the milestone goals by editing the titles and changing the number of goals by clicking on “+” or “-” below the titles. You can also change the percentage of shares for each goal.
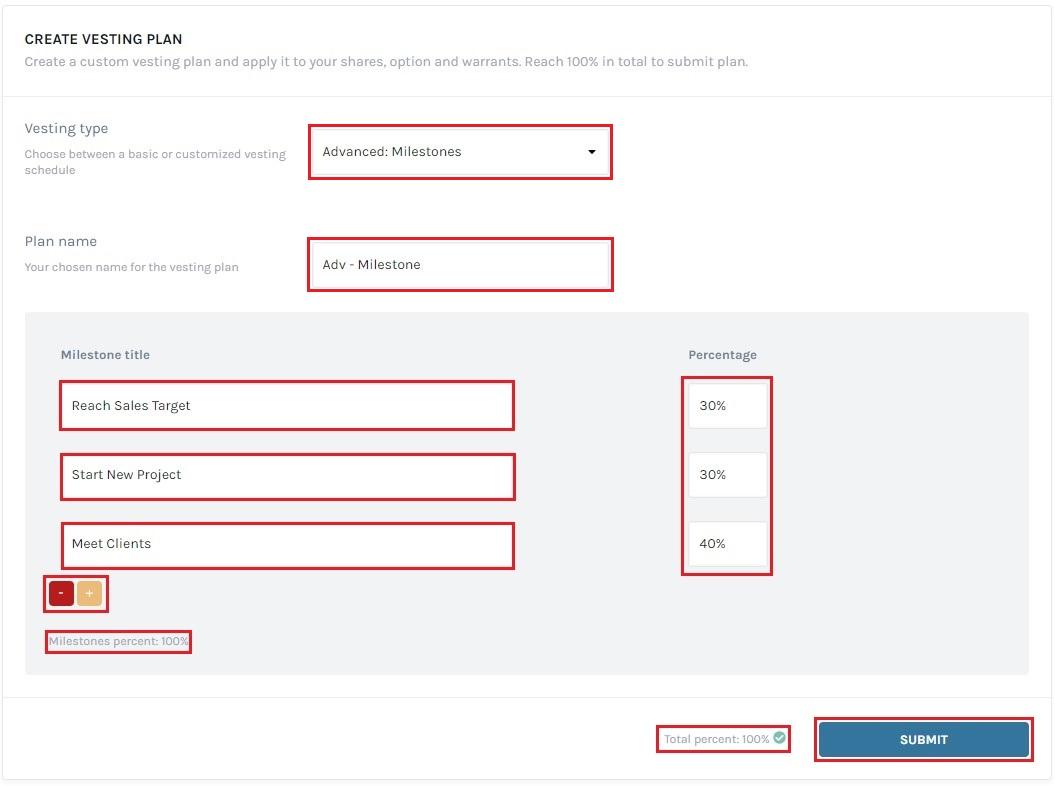
Once you are done, click on “Save” to finalize it. Ensure that the total percentage of the overall plan is 100% as shown beside the “Save” button.
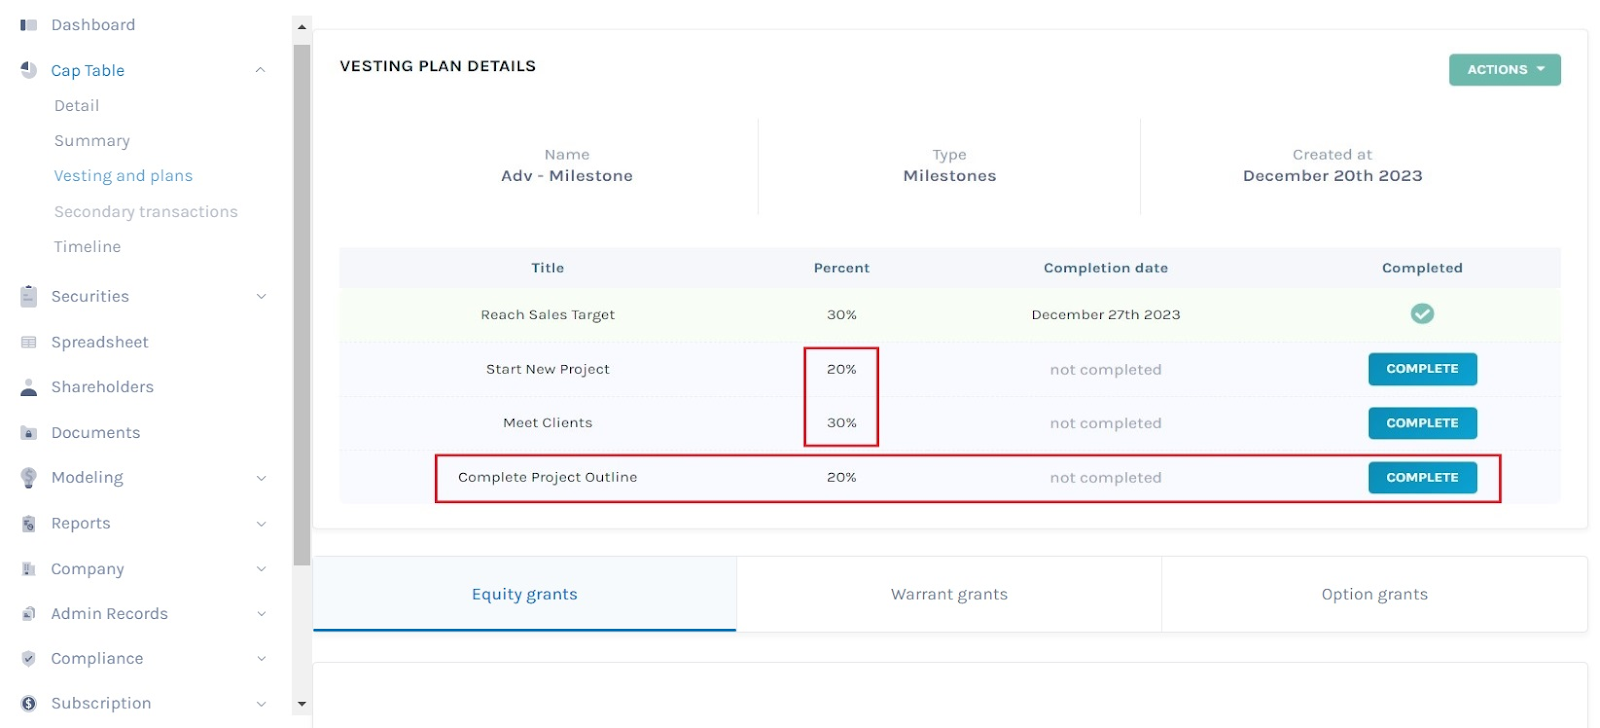
Step 5: By clicking on “Save”, the details will be saved and you will see the vesting details have been updated.
In this case, the percentage of shares for goals has been changed and a new goal has been added.
Now, you can use the vesting plan in your issuance process.
Note: You can add a vesting schedule while issuing shares, options, and warrants. Check out the respective support articles to learn about this.
Just like this, you can easily modify any vesting plan that you have created regardless of the plan type.
If you want to know more or understand any other process in Eqvista, check out the other support articles here or contact us today!